How to Use Leads Central
To ensure a seamless experience with our Lead Management System, please follow the professional guide below on how to effectively utilize its features:
Step By Step Guide
Step 1
Integrate Your Contact Forms and Social Media Accounts
Begin by connecting your website’s contact form directly to the CRM table to automatically capture leads submitted through your site. Similarly, integrate your social media accounts, such as Facebook Messenger, to funnel lead messages into the system as well. This integration ensures all potential leads from your website and social media platforms are centralized.
Step 2
Automatic Lead Capture and Organization
Once integrated, all incoming leads from your contact forms and social media accounts are automatically saved to the CRM table. This process ensures that every potential lead is captured and stored in a single, organized location for easy access and management.
Step 3
Spam Lead Filtering and Real-Time Notifications
Our system automatically filters out spam leads, ensuring only genuine leads are processed. The validated leads are then promptly forwarded to the admin’s email, enabling real-time notification and immediate action on potential opportunities.
Step 4
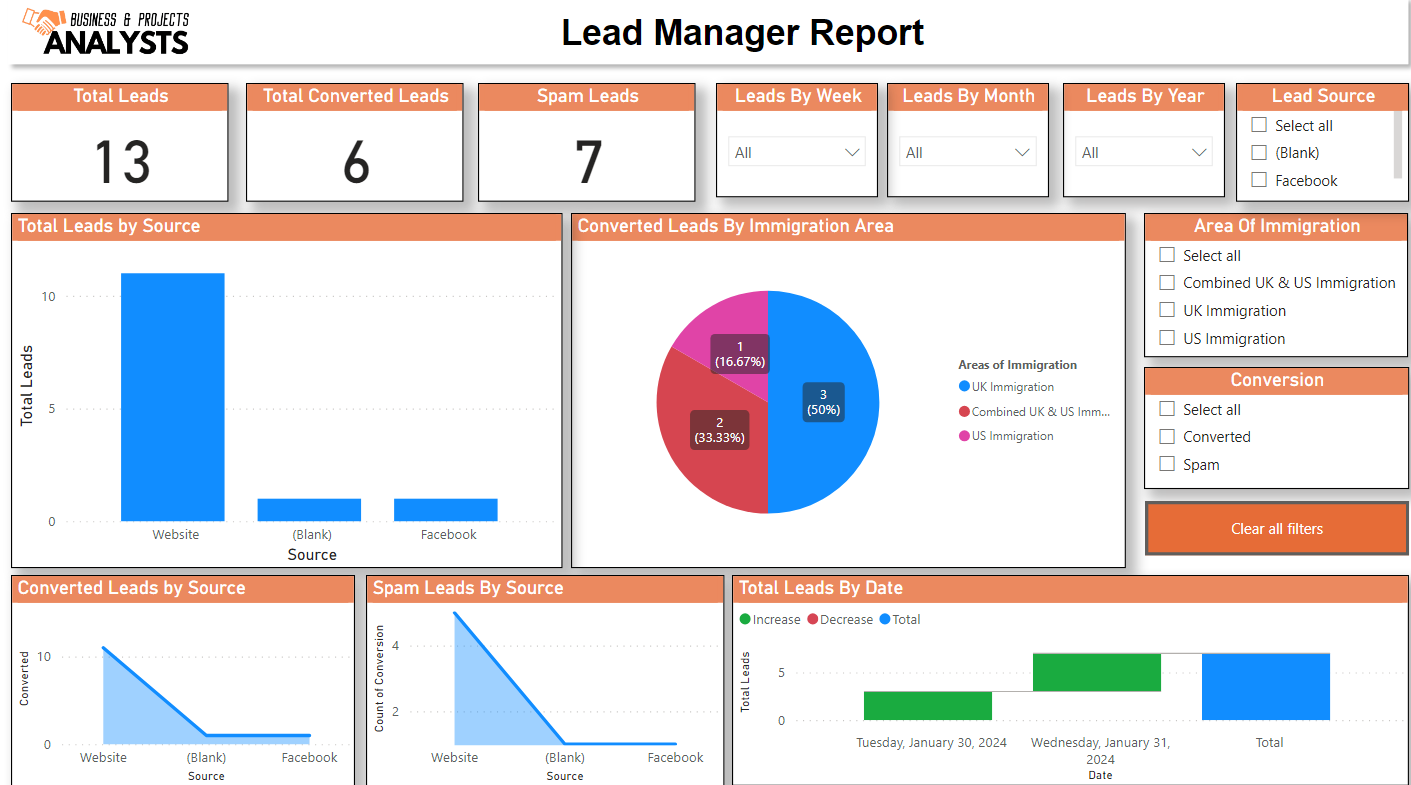
Access Comprehensive Analytics and Manage Leads
Administrators have the ability to view detailed analytics and reports within the system, providing insights into lead behavior, sources, and conversion rates. Additionally, the CRM table allows for efficient management and sorting of leads, enabling admins to organize leads according to various criteria for streamlined follow-up and engagement.
By following these steps, users can maximize the efficiency and effectiveness of their lead management process, ensuring no opportunity is missed and every potential lead is nurtured towards conversion.